A few years back a friend called and asked if I’d like to meet him at the shooting rage. I said, “Of course, I’ll be there in an hour.” After some preparation I jumped onto my KTM Duke and was on my way. About three miles into the ride the KTM’s rear felt spongy. I pulled over, looked, and found that I had a flat. A nail had worked it’s way into my Metzler Sportec M7 tire. Aside from having to miss time at the shooting rage, I was frustrated by the fact that I had no way to fix the flat, even temporarily. With no tire repair kit that includes sealant and a means to inflate the tire, a flat on a motorcycle is a serious issue.
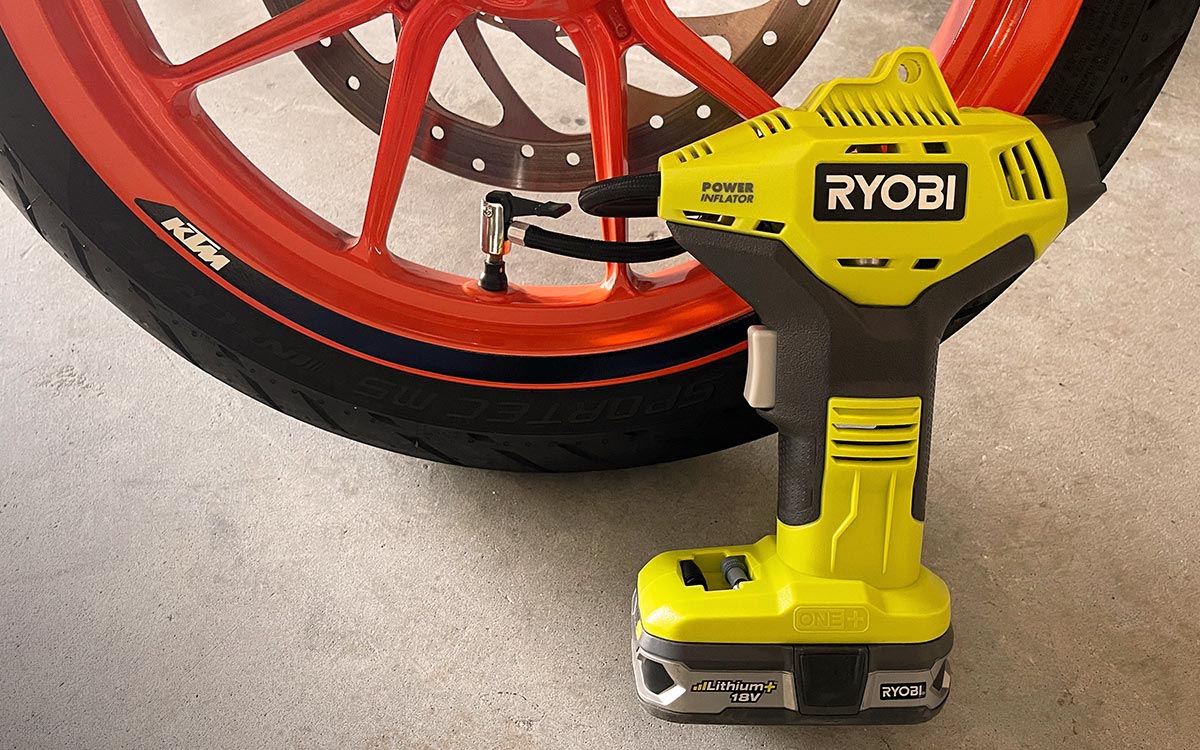
I called my wife and asked her to bring me my Ryobi Power Inflator. I inflated the tire, rode a mile, pulled over, and inflated the tire again. I was able to make it home after stopping and topping off the tire pressure three to four times. I then ordered and installed a new Metzler M7.
I try my best to learn from my mistakes. After what happened I started carrying a very small 12 volt portable inflator in the GIVI Outback top case attached to the rear of the KTM. I also carry a bottle of Slime Emergency Tire Sealant. Between the two I can now get myself back on the road fast in the event of a flat on my KTM motorcycle.
This got me thinking about our Honda Pilot. It generally takes even an experienced mechanic about a half hour to change out a flat tire on the side of the road using the OEM jack and tools in a modern vehicle. Worse than the time involved is the fact that the spare is often a temporary “donut-style” tire meant to be used for only short distances. Many who’ve created Overland or Bug-out rigs solve this issue by carrying at least one full-size spare tire along with a Hi-Lift jack. At this point I have neither the budget nor the room for these options.
Instead, I augmented the Loadout Level 3B (Vehicle Survival) bag that we keep in our Pilot at all times with an emergency tire repair kit. For a review of the contents in our LL-3B bag, please see the post dated 26 August 2020 by clicking here. The comprehensive Loadout Level concept we recommend is fully explained in the Panoplia.org Soft Skills and Tactics course. A visual overview can be seen by clicking here.
The emergency tire repair kit we setup includes a Ryobi Power Inflator. This is about the size of a drill, and has worked flawlessly since I purchase it back in 2018. I’ve had various size air compressors over the years, but for topping off one’s tire pressure from time to time the Ryobi is great. It takes no time to set up, and includes a fairly accurate air pressure gauge on the back end. You can read this as you’re inflating the tire, or when you stop. There’s no need to remove the unit from the tire to read the gauge.
I chose to use an MTM ACR8-72 Ammo Crate Utility Box to house our emergency tire repair kit. This measures 19” x 15.75” x 8” high. While I was at it I included some emergency water and food. This is in addition to the food and water filters we keep in our LL-3B, and can be seen in the images below.
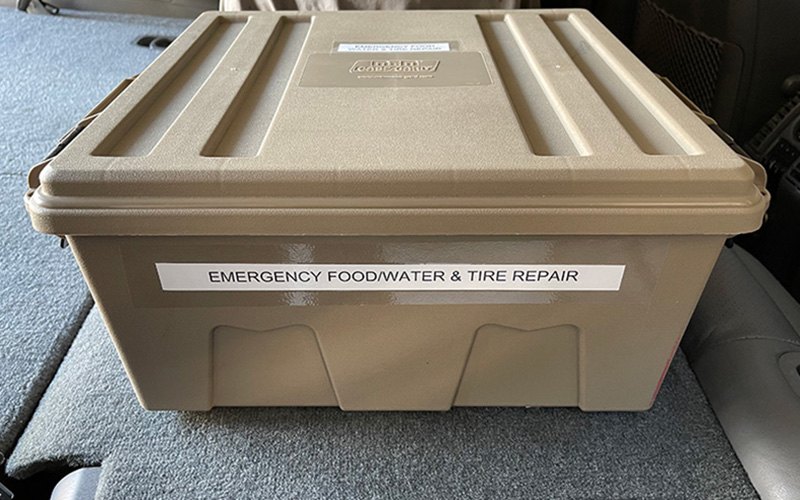
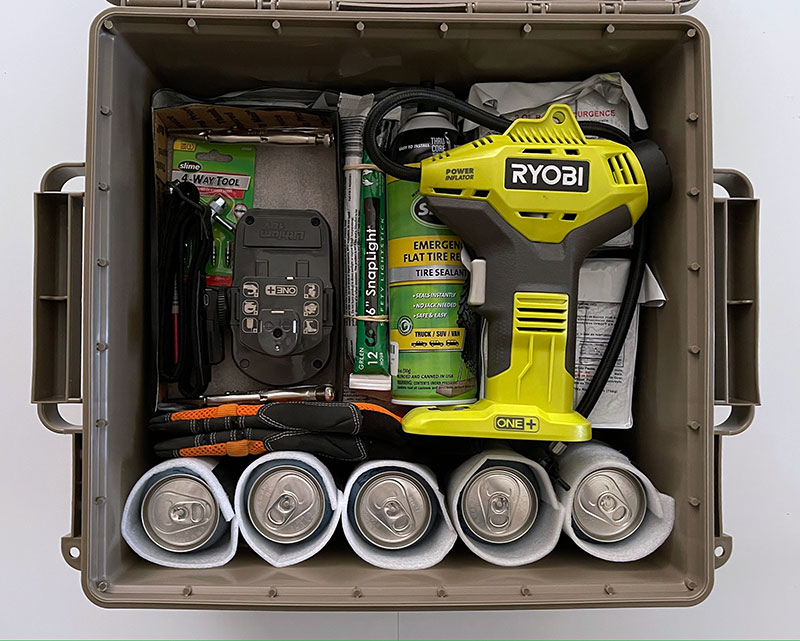
The Emergency Ration packs and the emergency drinking water (they can just be seen in the image above) are both meant to withstand the heat of being stored in a vehicle, and have very long shelf-lives. We plan to review these in another post soon. The Kit also includes a battery to run the Ryobi, a bottle of Slime Emergency Tire Sealant suitable for an SUV, a tire gauge, a tire valve kit, a headlamp, gloves, and a few SnapLight Glow Sticks to use in place of road flares. Recall that our LL-3B bag includes basic hand tools.
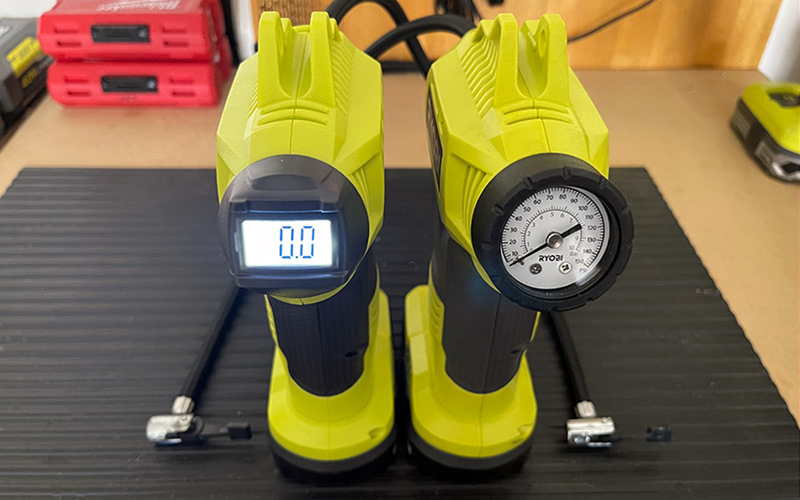
The Ryobi 18V ONE+ system includes an amazing number of power tools. I have several in both the 18 and 40 volt lines. I’ve been amazed at how well these have served me over a number of years. Most of the cost is in the batteries. With this in mind, I purchased a second Power Inflator for about $32.00. I keep this in my garage, and I placed the original one in the tire repair kit in that stays in the Honda Pilot. The only difference is that the new model has a digital gauge rather than the standard one.
I’ve found that the Ryobi batteries hold their charge well. I’ve set up a charging station on the back of my tool bench as shown in the image below.
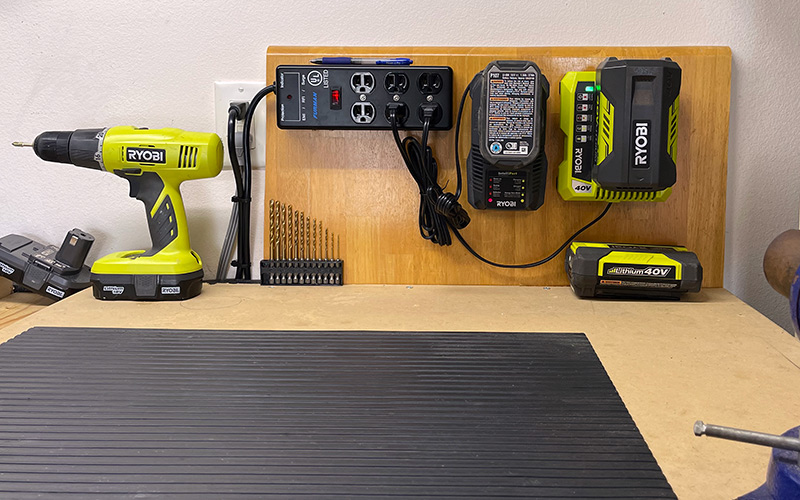
The 40 volt battery on the charger (the green charger on the right) is a backup. I’ve not used this for a year or so, and was surprised to see that it had retained about a 70% charge over that time period. The 18 volt battery that I keep in the emergency tire repair kit will be on a three-month recharge schedule.
Anyone who knows his or her way around a vehicle can tell you the importance of keeping your tires properly inflated. Using the Ryobi Power Inflator makes this periodic task simple and easy. Having it together with Slime Emergency Tire Sealant and the other items shown in the Kit above will allow you to get your vehicle back on the road fast in the event of a flat. The ability to do so quickly is especially important during times of crisis or conflict. One thing to keep in mind is that like any other air compressor, large or small, the Ryobi Power Inflator makes a good bit of noise. It’s not something you’d want to use when stealth is essential.
Let us know in the Comment section below if you have other methods of dealing with flat tires that get you up and running quickly.
As always, remember that Panoplia.org has no affiliate relationships with manufacturers or retail suppliers, nor do we participate in third-party advertising. We simply share our views about gear and supplies that work well for us under hard use.



Love this little gadget. Spent lots of time researching the bulky and expensive air pressure options until I ran into this accessory from Ryobi. Some reviews were complaining about its accuracy but I have never had an issue. I’ve double checked with a separate high quality tire pressure gauge and is always on the money. I use it on my car and motorcycle.
Agreed! Thank you, Sir!